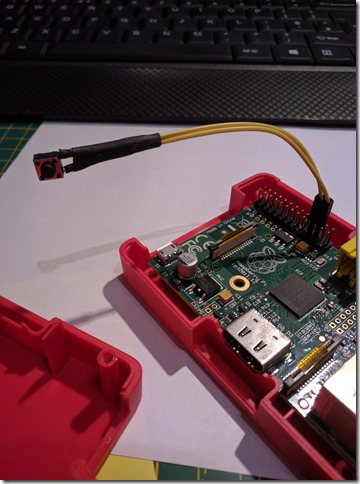
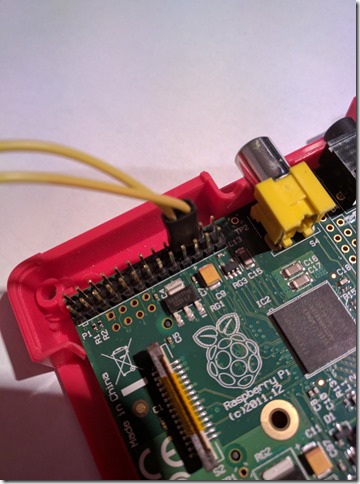
How To Make A Raspberry Pi Shutdown Button
After one too many times of forgetting to shutdown my (headless) Raspberry Pi before shutting down my PC/laptop (and resorting to just pulling the power plug), I decided I needed a button to shut it down gracefully – a ‘Raspberry Pi Shutdown Button’…
There’s lots of solutions around for this, but I decided to re-invent the wheel (as usual)…
Making a Raspberry Pi Shutdown Button
This is a fairly simple project, with a little bit of easy soldering required. I had all the bits I needed laying around in various component boxes. It’s not a lot and is likely to cost less than £1 for one. However, typically, you can’t buy these items in ones, they come in quantities of twenty or fifty. Even so the total cost should be much less than £10 and you’ll have a bunch of useful parts left over.
Here’s the list of what you’ll need (with links to buy the components if you don’t have them):
- One small PCB push button.
- One jumper wire (female to female).
- Some heat-shrink tubing (1x 2mm and 1x 6mm).
- A multi-meter.
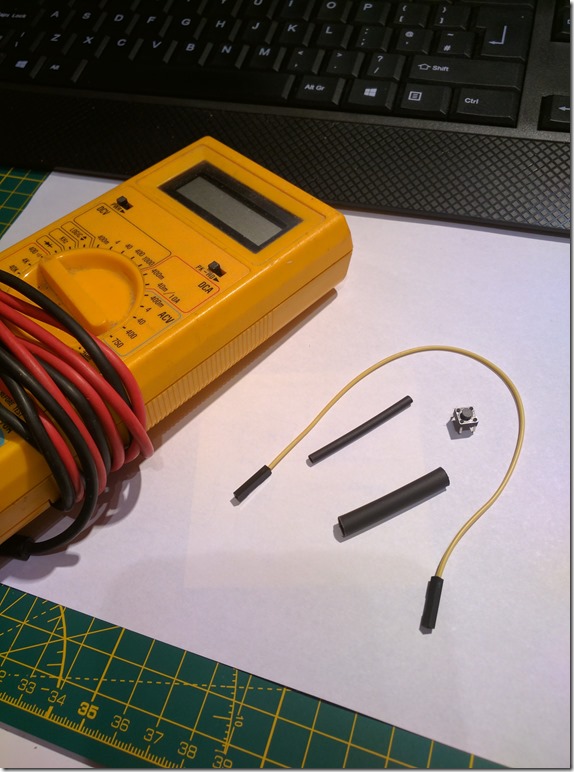 ](https://kapie.com/wp-content/uploads/2016/09/IMG_20160914_213850.jpg
Step 1 – The Button.
First we work out which legs of the button are shorted when the button is pushed. Using the multi-meter determine which two pins get shorted together when the button is pushed. There will be two sets of 2 pins that get shorted (as the button has four legs). We only need one set, so the other two legs we simply break off (bending them back and forward multiple times works well).
Step 2 – The Jumper Wire.
The jumper wire gets folded in half and cut in two at the middle point, so that we have two bits of similar lengths, each with the female connector on one end. The other end we strip two or three millimeters of insulation from. As an aside, I like to use yellow or white for these kind of things as Red, Green, Black all make me think ‘power supply lines’.
Step 3 – The Heat Shrink Tubing.
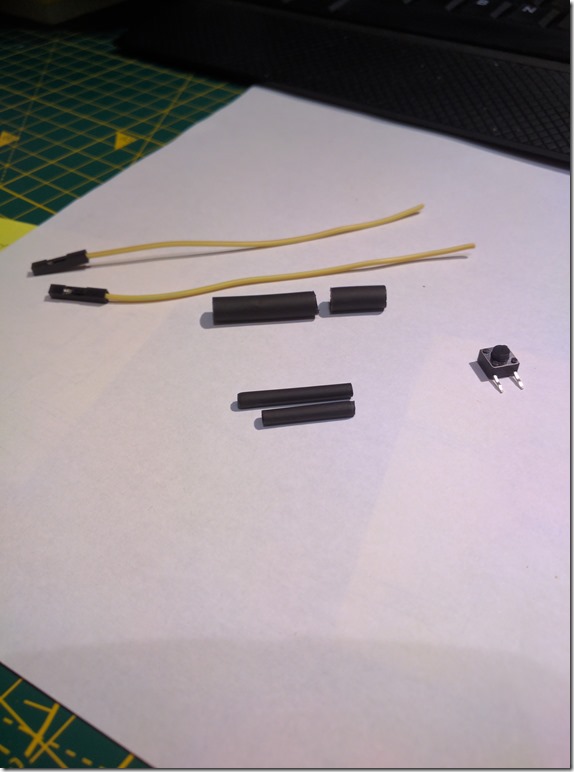
For the thinner piece (2mm diameter) of tubing, we cut it in half (so each piece is around 20mm long). For the thicker piece (6mm diameter), we cut it into two lengths, one is 1/3 and the other is 2/3 (so for a 40mm long piece, one of the cut pieces would be about 13mm long and the other 27mm long). Lengths do not have to be accurate – these figures are just a guide (we can be a bit ‘rustic’).
Now we should have something like the image below.
Step 4 – Placing the Heat Shrink Tubing.
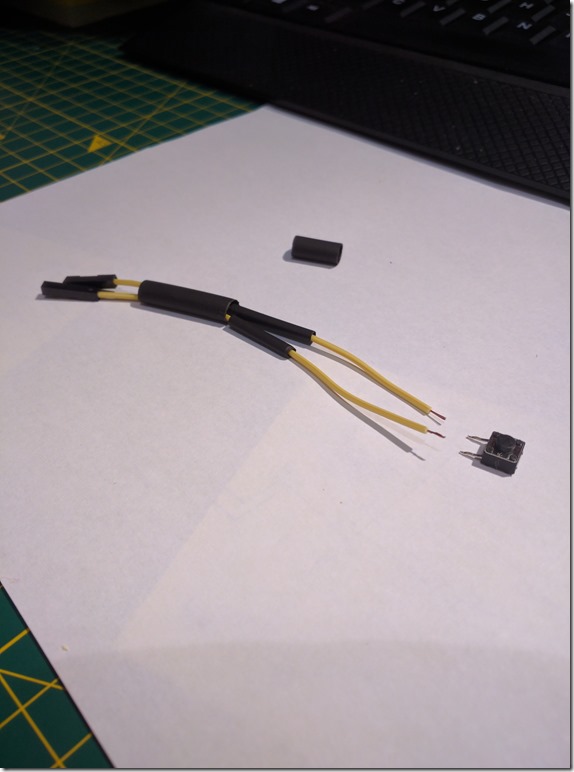
I usually find myself staring at some left heat shrink after I’ve finished soldering. Then realize that I forgot to put it on, and have to redo it all. So, make sure you put the heat shrink on first. You want to (in order):
- Hold both wire lengths together and slip the thicker tubing over both (from the end with no connectors).
- Now slip each thin bit of tubing over a different one of the wires.
- All you should have left is the shorter, thicker bit of heat shrink tubing.
Step 5 – Soldering Time.
The soldering involved is really easy. Essentially you want one wire connected to each leg of the button. It doesn’t matter which way around it is.
- ‘Tin’ the ends of both wires.
- ‘Tin’ both the button legs.
- Solder a wire to each leg.
Step 6 – Shrinking.
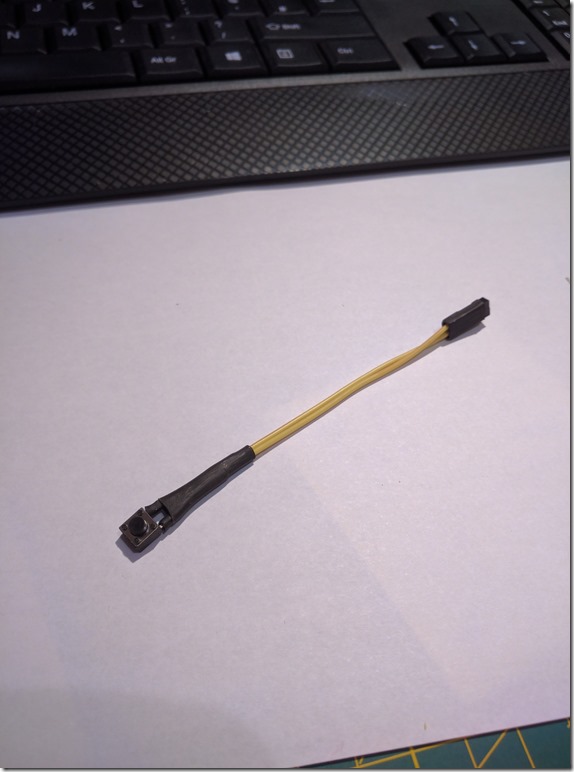
All that is left on the hardware side is to shrink the tubing. You need to push the two thinner pieces (one on each wire) as far as possible towards the button legs. Try to ensure that there is no bare wire or bare leg visible. Now shrink both of those so that they hold tight. Next push the thicker tubing over the two bits you just shrunk. It doesn’t have to go all the way. It is more just to hold the wires together. Now shrink that too.
Now the final shorter, thicker bit of tubing I push over the two connectors (it should be a fairly tight fit). This just makes it easier to insert the connector as one unit rather than as two separate wires.
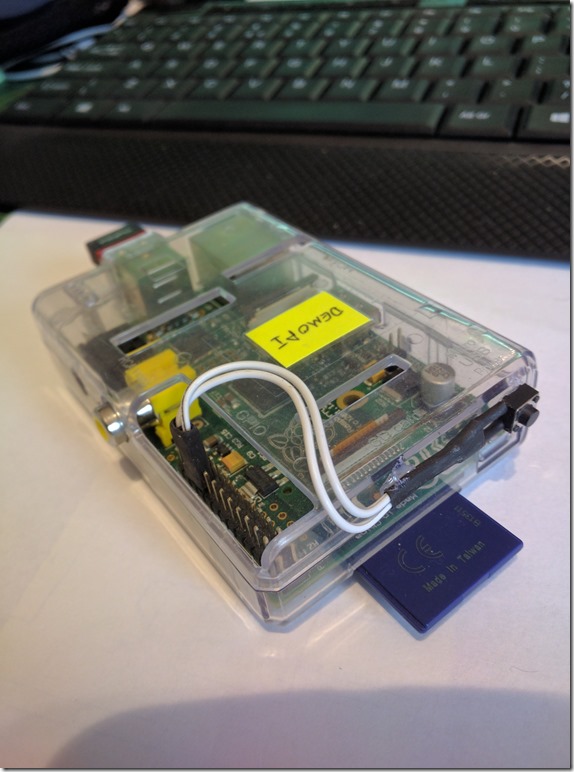
Great the hardware is now done. You can place the connector onto P1 connector pins 20 (Ground) and 22 (GPIO 25) and we can write the software that monitors the button and does the shutdown.
Step 7 – The Software.
So, our button is connected between GPIO 25 and ground. We’ll want our software to:
- Set up GPIO 25 as an input.
- Set up GPIO 25 as pulled high by default
- Wait for GPIO 25 to go low (button pressed)
- Make sure GPIO 25 stays low for a set time (to avoid shutdowns on accidental presses)
I’m going to do this in a simple bash script. I’m also going to make sure the script runs when the Raspberry Pi boots.
To set and monitor the GPIO pins we’re going to use the ‘gpio’ utility that ships with Raspbian Jesse.
We’re going to check every second to see if the pin is low. If it is we’re going to check again in another 5 seconds that it is still low. If that is the case then we are going to shutdown (and halt).
We’ll keep it user friendly by issuing a terminal message to all users when the shutdown happens.
Here is the code for the script (shutdown.sh)
1
2
3
4
5
6
7
8
9
10
11
12
13
14
15
16
17
18
19
20
21
22
23
24
25
26
27
#!/bin/bash
# Raspberry Pi Shutdown Button Script

# Wait for a minute – to let everything settle.
sleep(60)

# Set up GPIO pin 25 as input and pull-up
gpio -g mode 25 in
gpio -g mode 25 up
sleep(5)

# wait for pin to go low
while [ true ]
    do
    if [ “$(gpio -g read 25)” == ‘0’ ]
    then
        echo “Hold button to shutdown Pi…”
        sleep 5
        if [ “$(gpio -g read 25)” == “0” ]
        then
            echo “Raspberry Pi Shutting Down!”
            sudo halt &
            exit 0
        fi
    fi
    sleep 1
done
When you have written the script make sure you make it executable:
chmod +x shutdown.sh
To ensure it runs on every boot you need to edit your /etc/rc.local file, so in terminal type:
sudo nano /etc/rc.local
and add the following to the end of the file, but before the final exit 0 line:
1
2
3
# Raspberry Pi Shutdown Button Monitor Script
printf “Starting Raspberry Pi Shutdown Button Monitor Script”
sudo /home/pi/shutdown.sh &
That’s us done. You now have a button that you can hold for ~5 seconds and it will cleanly shutdown your Raspberry Pi.
If you want to make things a little neater you can use some hot glue to secure your button to the case you are using. I glued mine to the end of the case, above the micro USB power connector. All it needed was a small dab for the base of the button and a small dab for the wires to hold it straight. There is less chance of it being mistakenly pressed when glued there, and it’s out the way. It looks pretty clean there too.
